Using a Pre-Bend
Some types of collisions can be avoided by splitting a bend operation into a pre-bend and a finishing bend. Here is a simple example:
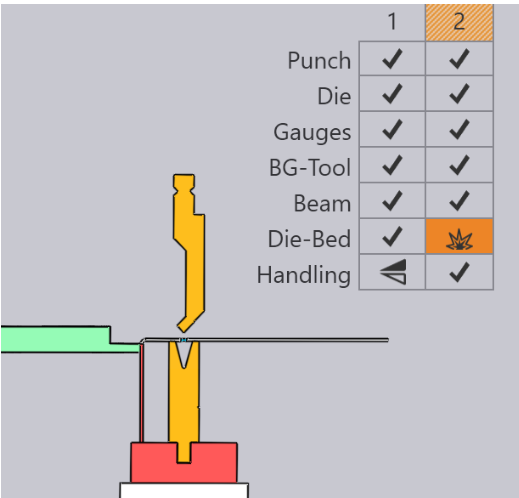
The part above has two bends, and on the second bend the part collides with the die-rail. This cannot be fixed by changing the sequence. One possible fix is to introduce a pre-bend at bend 1, by choosing bend 1 and enabling the Pre-bending check-box.
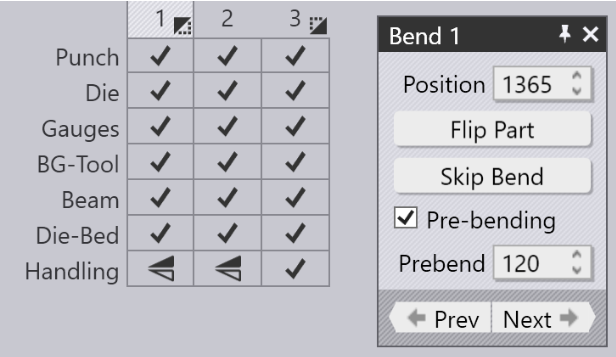
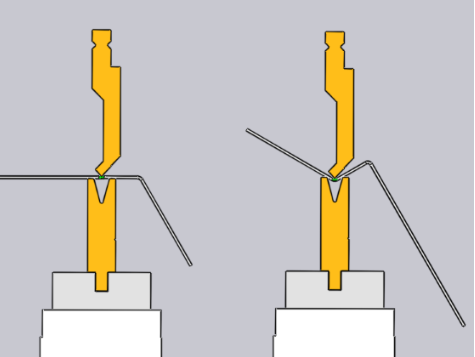
As seen in the image, this splits bend 1 into a pre-bend and a finishing-bend (which now becomes bend 3). The icons on the bend-navigator now indicate that bend 1 is a pre-bend, while bend 3 is a finishing bend. You can use the Prebend input box to fine-tune the angle of the pre-bend. In this example, the angle is set to 120, so the part is bent from the flat state (180 interior angle) to 120 degrees in the first stage, and then to 90 degrees in the second stage. Thus, during the processing of bend 2, the first flange is not fully bent, and so avoids a collision with the die-rail (the images below show the situation when bends 2 and 3 are being processed):